Chocolate Hazelnut Thumbprint Cookies
Uitgelicht onder: Zelfgebakken favorieten
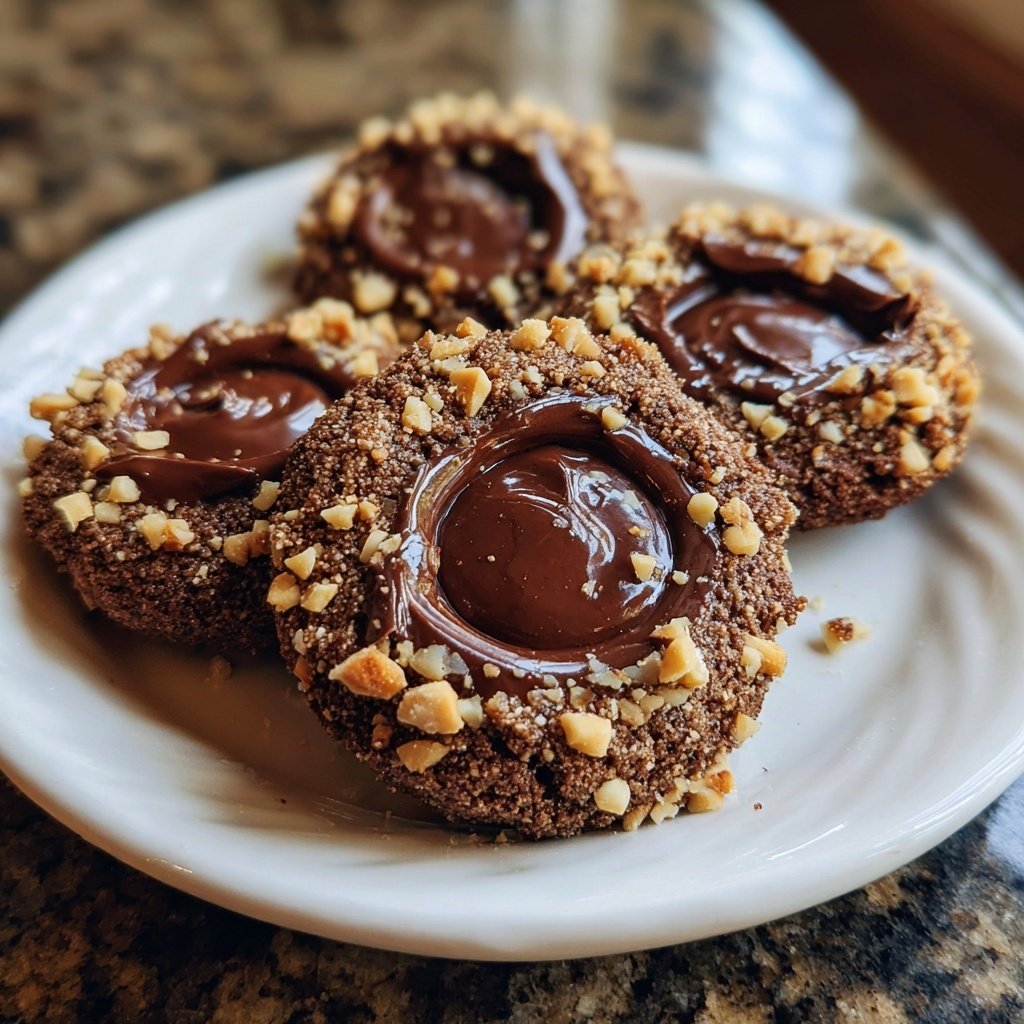
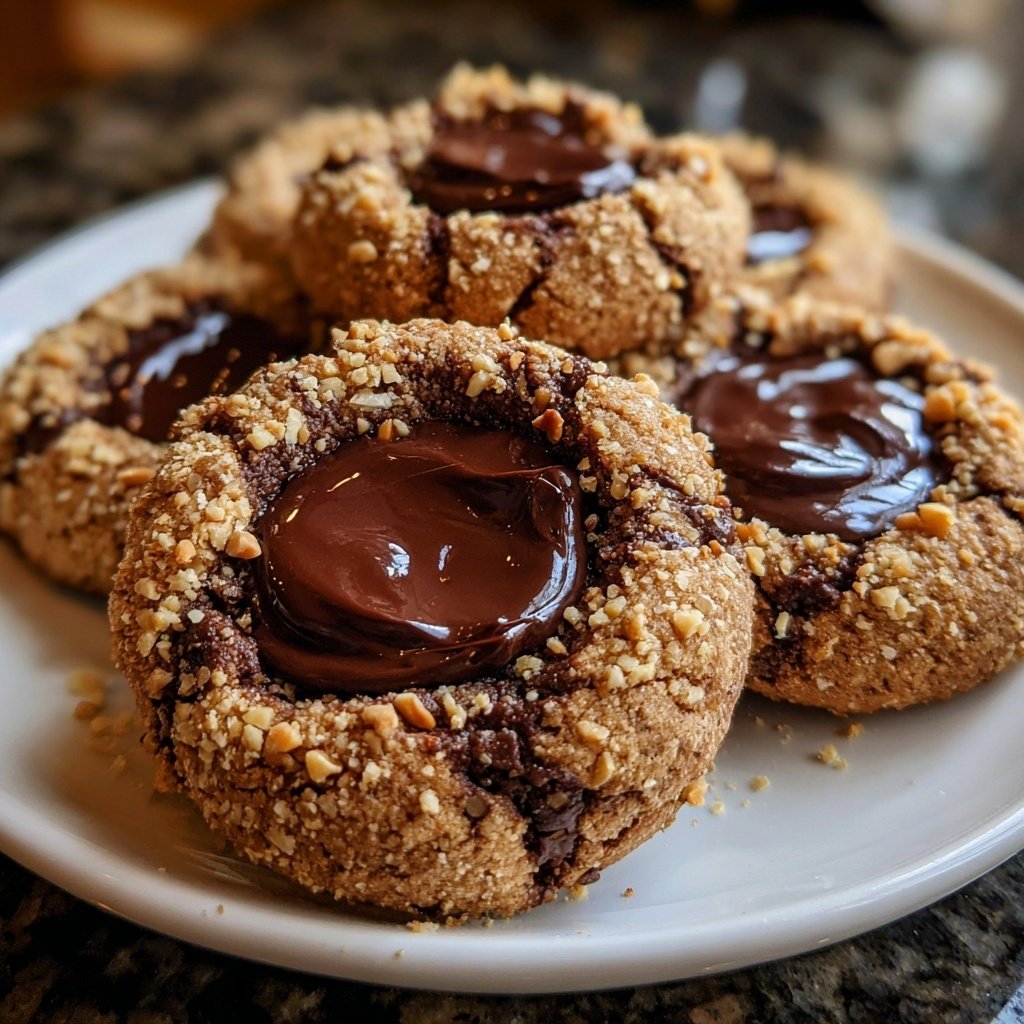
I absolutely love making these Chocolate Hazelnut Thumbprint Cookies. The combination of buttery dough and rich chocolate filling not only satisfies my sweet tooth but also adds a delightful nutty flavor. The thumbprint method allows for a generous amount of chocolate to be nestled right in the center of each cookie, making each bite velvety and indulgent. Whether for a special occasion or just to enjoy with a warm cup of tea, these cookies never fail to impress. Plus, they're surprisingly easy to make!
When I first attempted to make Chocolate Hazelnut Thumbprint Cookies, I was amazed at how simple yet elegant they turned out. Each cookie's base is a tender, buttery dough that complements the sweet and nutty filling perfectly. I discovered that chilling the dough before baking makes a significant difference, preventing the cookies from spreading too much and helping them retain their shape.
One of my favorite parts is preparing the chocolate filling, where I use high-quality dark chocolate to elevate the flavors. It’s essential to let the chocolate cool slightly before adding it to the thumbprint, as this way it remains deliciously gooey without hardening too quickly. Trust me, these cookies are a treat for both the eyes and the taste buds!
Why You'll Love These Cookies
- Rich chocolate center surrounded by buttery cookie dough
- Crunchy hazelnuts that add delightful texture
- Perfect for gifting or holiday gatherings
Understanding Ingredients
The role of hazelnuts in these cookies extends beyond just flavor; they add a lovely crunch that balances the softness of the buttery dough. When finely chopped, they incorporate seamlessly into the cookie base, ensuring every bite has that satisfying nutty texture. If you're unable to find hazelnuts, walnuts or pecans can be used as substitutes, but they will impart a different taste. Opt for roasted nuts to enhance their natural flavor and aroma.
Butter plays a crucial role in achieving the tender texture of these cookies. The creaming process not only adds air, making the cookies lighter, but also helps distribute the sugar uniformly. It's important to use unsalted butter for this recipe to control the sodium levels, allowing the sweetened chocolate filling to shine. Make sure your butter is at room temperature for optimal blending, which should take about 3-5 minutes with a hand or stand mixer.
Perfecting the Cookie Dough
Chilling the dough is an essential step that not only firms it up for easier handling but also enhances the flavor as it allows the ingredients to meld together. If you're in a hurry, chill the dough for at least 15 minutes, but for the best results, aim for the full 30 minutes. This will make the dough less sticky and prevent the cookies from losing their shape while baking.
When forming the thumbprints, make sure you apply just the right amount of pressure. You want a well-defined indentation but be careful not to push all the way through the dough. If you find your dough is too soft to handle, return it to the refrigerator for a few more minutes. Remember, once baked, the cookies will retain their thumbprint shape, so take your time during this step to achieve perfect little nests for that luscious chocolate filling.
Ingrediënten
Gather the following ingredients to create these delectable cookies:
For the Cookies
- 1 cup unsalted butter, softened
- 3/4 cup granulated sugar
- 2 large egg yolks
- 2 teaspoons vanilla extract
- 2 cups all-purpose flour
- 1/2 teaspoon salt
- 1 cup finely chopped hazelnuts
For the Chocolate Filling
- 1 cup dark chocolate, chopped
- 1/2 cup heavy cream
Make sure to have everything ready before you start baking!
Bereidingswijze
Follow these simple steps to make your thumbprint cookies:
Prepare the Dough
In a mixing bowl, cream the softened butter and sugar together until light and fluffy. Add the egg yolks and vanilla extract, mixing until combined. Gradually add the flour and salt, stirring until the dough comes together. Finally, fold in the chopped hazelnuts.
Chill & Shape
Cover the dough with plastic wrap and refrigerate for 30 minutes. Preheat your oven to 350°F (175°C). Once chilled, scoop tablespoon-sized portions of dough and roll them into balls. Place them on a baking sheet lined with parchment paper.
Make Thumbprints
Using your thumb or the back of a small spoon, create an indentation in the center of each dough ball. Bake in the preheated oven for 12-15 minutes, or until lightly golden around the edges.
Prepare the Chocolate Filling
While the cookies cool, heat the heavy cream in a saucepan until just simmering. Remove from heat and add the chopped chocolate, stirring until completely melted and smooth.
Fill & Finish
Spoon the chocolate filling into the thumbprints on the cooled cookies. Allow the chocolate to set before serving. Enjoy your delicious homemade treats!
These cookies are best enjoyed fresh, but they can be stored in an airtight container for up to a week.
Professionele Tips
- Ensure your cookies are completely cool before adding the chocolate filling to prevent it from melting too much. For added flavor, you can sprinkle a pinch of sea salt on top of the chocolate before it sets!
Storage and Freshness
These Chocolate Hazelnut Thumbprint Cookies are best enjoyed fresh, but they can be stored in an airtight container at room temperature for up to a week. If you want to keep them longer, consider refrigerating for up to two weeks; just allow them to come to room temperature before serving to bring back that delightful texture. If you've made a large batch, freezing is an excellent option. Wrap the baked cookies in plastic wrap, place them in a freezer-safe bag, and they will last for up to two months.
If you prefer to freeze the cookies before filling, you can also prepare and freeze the dough itself. Once formed into balls, freeze them on a baking sheet, then transfer to a freezer-safe container. When you're ready, bake directly from frozen, adding an extra minute or two to the baking time.
Serving Suggestions and Variations
To elevate your serving experience, consider pairing these cookies with a glass of milk or a cup of coffee. The rich chocolate and nutty flavors are complemented beautifully by a creamy beverage. You could even serve them with a scoop of vanilla ice cream for an indulgent dessert that impresses guests. Dusting the finished cookies with a sprinkle of sea salt can enhance the flavor contrast as well, making each bite even more satisfying.
For a fun twist on the original recipe, try adding spices such as cinnamon or espresso powder to the dough for an extra layer of flavor. You can also experiment with different fillings, such as caramel or peanut butter, to suit your preferences. If you love a nutty combination, using crushed almonds or pecans instead of hazelnuts in the dough is another delightful variation.
Vragen Over Recepten
→ Can I use milk chocolate instead of dark chocolate?
Yes, you can use milk chocolate for a sweeter filling, but keep in mind it will change the flavor profile.
→ What if I don't have hazelnuts?
You can replace hazelnuts with chopped walnuts or almonds for a similar texture and flavor.
→ How do I store the cookies?
Store the cookies in an airtight container at room temperature for up to one week.
→ Can I freeze the dough?
Absolutely! You can freeze the dough for up to three months. Just thaw in the fridge before shaping and baking.
Chocolate Hazelnut Thumbprint Cookies
Gemaakt door: June Weatherby
Recepttype: Zelfgebakken favorieten
Vaardigheidsniveau: Intermediate
Eindportie: 24 cookies
Wat je Nodig Hebt
For the Cookies
- 1 cup unsalted butter, softened
- 3/4 cup granulated sugar
- 2 large egg yolks
- 2 teaspoons vanilla extract
- 2 cups all-purpose flour
- 1/2 teaspoon salt
- 1 cup finely chopped hazelnuts
For the Chocolate Filling
- 1 cup dark chocolate, chopped
- 1/2 cup heavy cream
Stappen
In a mixing bowl, cream the softened butter and sugar together until light and fluffy. Add the egg yolks and vanilla extract, mixing until combined. Gradually add the flour and salt, stirring until the dough comes together. Finally, fold in the chopped hazelnuts.
Cover the dough with plastic wrap and refrigerate for 30 minutes. Preheat your oven to 350°F (175°C). Once chilled, scoop tablespoon-sized portions of dough and roll them into balls. Place them on a baking sheet lined with parchment paper.
Using your thumb or the back of a small spoon, create an indentation in the center of each dough ball. Bake in the preheated oven for 12-15 minutes, or until lightly golden around the edges.
While the cookies cool, heat the heavy cream in a saucepan until just simmering. Remove from heat and add the chopped chocolate, stirring until completely melted and smooth.
Spoon the chocolate filling into the thumbprints on the cooled cookies. Allow the chocolate to set before serving. Enjoy your delicious homemade treats!
Extra Tips
- Ensure your cookies are completely cool before adding the chocolate filling to prevent it from melting too much. For added flavor, you can sprinkle a pinch of sea salt on top of the chocolate before it sets!
Voedingswaarde (Per Portie)
- Calories: 150 kcal
- Total Fat: 10g
- Saturated Fat: 3g
- Cholesterol: 30mg
- Sodium: 50mg
- Total Carbohydrates: 15g
- Dietary Fiber: 1g
- Sugars: 8g
- Protein: 2g